This post contains affiliate links. As an Amazon Associate, I earn from qualifying purchases at no extra cost to you.
A properly aligned phono cartridge is the invisible foundation of great vinyl playback. Alignment affects every aspect of the listening experience: soundstage, channel balance, dynamics, and stylus wear. Yet many vinyl enthusiasts skip this step, assuming their cartridge came aligned from the factory or close enough. The reality is more nuanced. Most modern cartridges leave the factory with generic settings that prioritize shipping durability over sonic accuracy. Your specific tonearm geometry requires individual tuning. Three parameters matter most: vertical tracking angle (VTA), overhang, and azimuth. Get these wrong and you’re losing high-frequency detail, creating channel imbalance, and accelerating stylus wear. Get them right and you’ll unlock performance your turntable and cartridge were designed to deliver.
This guide explains what each parameter does, why it matters, and exactly how to dial them in yourself without expensive tools or professional services. You’ll need a ruler or alignment tool, the Turntable Lab Phono Cartridge Alignment Protractor Tool with mirrored surface for precision costs under $15 and is the standard choice for most tonearms, some basic patience, and understanding of your tonearm’s geometry. If you’re upgrading a cartridge or suspect your current alignment is drifting after months of use, working through these steps will restore clarity and precision to your vinyl listening.
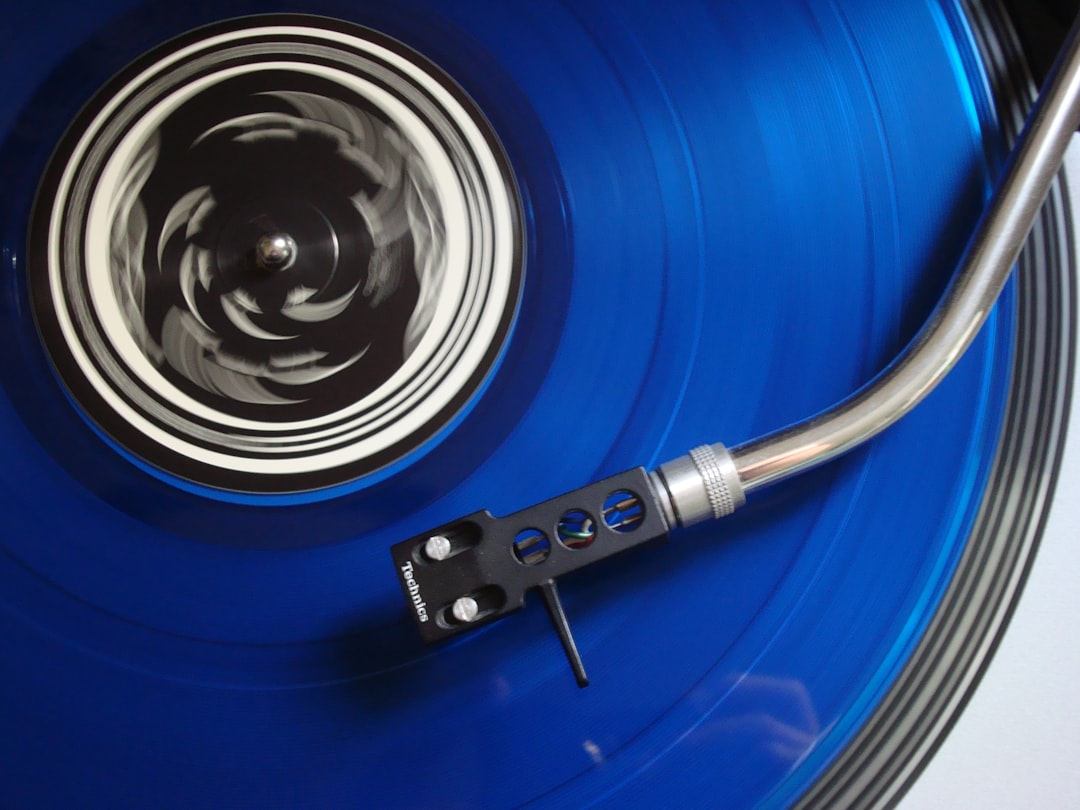
Photo by Konstantinos Hasandras on Unsplash
The three critical parameters for proper cartridge alignment each affect sound quality differently. Understanding what each one does and why it matters helps you identify problems when you hear them and make targeted adjustments.
Vertical tracking angle, or VTA, is the angle at which the stylus meets the record groove in the vertical plane. Imagine looking at your turntable from the side: VTA is the angle the tonearm makes relative to the record surface. The stylus should ideally sit perpendicular to the groove walls, which typically means VTA around 92 degrees from horizontal, or about 2 degrees forward-tilt from level. This matters because groove walls sit at specific angles depending on how the record was cut. If your stylus approaches the groove at the wrong angle, it contacts less of the groove wall surface, reducing contact area and changing the signal the cartridge generates.
The consequences of incorrect VTA are audible and cumulative. With VTA too shallow (more horizontal), your stylus digs deeper into the groove, emphasizing bass frequencies, dulling highs, and creating a veiled, muddy sound. You also increase wear on the stylus tip and groove walls because the contact geometry isn’t optimized. The opposite problem, VTA too steep (more vertical), creates a brightness or harshness in the treble, particularly in the 2-5 kHz range where the ear is most sensitive. This feels like listening through a presence peak: every vocal sibilant and cymbal clash jumps forward unnaturally.
Most vintage tonearms allow VTA adjustment by raising or lowering the arm rest or pivot point. Some modern arms and most SME-type arms feature fine VTA adjustment via a threaded post at the rear. If your arm offers no adjustment, VTA is fixed, and you’re working with whatever geometry the manufacturer built in. In that case, focus your efforts on overhang and azimuth instead. For adjustable arms, the procedure involves lifting the arm carefully without playing a record and comparing the height of the cartridge against the record surface. You’re aiming for the stylus needle to sit at roughly 92 degrees perpendicular to the groove. In practical terms, this means the front of the cartridge body should sit just slightly forward of parallel to the record. Many people eyeball this and get close enough, but precision tools help tremendously.
A Hudson Hi-Fi Turntable Cartridge Alignment Vertical Tracking Angle Block is a solid reference tool if your tonearm allows adjustment. It’s a machined block that shows you the ideal angle visually, typically costing under $20. Place it under the stylus to check your arm geometry. Some audiophiles measure VTA by placing a record on the platter and using a small protractor, but the visual block method is simpler and accurate enough for vintage gear. Changing VTA after you’ve dialed in your sound is tempting when chasing tone, but avoid frequent adjustments. Each time you raise or lower the arm rest, you’re likely bumping overhang and azimuth slightly. Make your VTA adjustment once, verify it carefully, then move on.
One important note: VTA interacts with tracking force. If you increase VTA (making the angle steeper), the stylus experiences more vertical force. If you decrease VTA, the vertical component of tracking force changes. This is why the sequence matters: set VTA first, then verify tracking force, then adjust azimuth. If you change tracking force later, you may need to revisit VTA. On vintage turntables without VTA adjustment, accepting the arm’s fixed geometry is often the best approach. Focusing your energy on overhang and azimuth will give you 80 percent of the improvement available.
Overhang is the distance the cartridge extends beyond the tonearm pivot point. It affects two critical things: the geometry of the arm’s tracking and the stylus’s contact with the groove at different distances from the spindle. Proper overhang minimizes tracking error, the amount by which the stylus doesn’t point directly at the spindle as it moves across the record. On a perfectly designed tonearm with zero tracking error at every point on the record, the stylus would always point exactly at the center spindle. In reality, the best tonearms achieve minimal tracking error in a narrow band near the middle of the record and accept small amounts of error at the beginning and end.
The geometry works like this: the tonearm is a lever that pivots at one point. The stylus sits at the other end. As the arm swings across the record, the angle between the arm and the radial line from spindle to stylus constantly changes unless the overhang is precisely tuned to your arm’s effective length. Most arms have a specified effective length (the distance from pivot to stylus tip), and cartridge overhang is typically 15-20mm depending on the arm design. Baerwald geometry, the most common alignment standard, balances tracking error across the record by accepting small amounts of error at specific points. Null points (where tracking error is zero) occur at roughly 65mm and 120mm from the spindle on a Baerwald-aligned arm.
Incorrect overhang creates tracking error all across the record, and tracking error means the stylus isn’t sitting in the groove correctly relative to the groove’s radial orientation. This causes channel imbalance (one channel slightly louder than the other), inner-groove distortion (particularly noticeable on rock and pop records with dense grooves), and accelerated wear. Too much overhang makes the stylus point inward toward the spindle. Too little makes it point outward. Either way, the result is distortion that worsens as you approach the end of the side.
To set overhang properly, you’ll need an alignment tool. The protractor I mentioned earlier is essential here. It’s a mirrored base with grid lines that show you where the stylus should sit relative to the spindle for your arm’s effective length. Place the protractor on the platter with the spindle hole aligned to your turntable spindle. Mark your cartridge body’s position against the grid lines while the stylus sits on the grid. The protractor shows both the overhang distance and the alignment geometry. You’re checking whether the stylus sits exactly on the specified null points for your arm type.
If overhang is wrong, you need to move the cartridge in its mounting bracket. Most cartridges mount in a sliding bracket secured by two small screws or clips. Loosen these (not all the way out, just enough to slide), and move the cartridge forward to increase overhang or backward to decrease it. The distance is usually small, often just 2-3mm. After each adjustment, recheck with the protractor. Patience here pays off dramatically. Getting overhang perfect is the single biggest improvement most home enthusiasts can make because even expensive professional services often skip it or do it hastily. Once you’ve dialed it in, mark the cartridge position with a small pencil line on the bracket for future reference.
Azimuth is the angle of the cartridge in the horizontal plane. Specifically, it’s the angle at which the stylus approaches the groove when viewed from above the record. Ideally, the stylus enters the groove perfectly centered, contacting both groove walls equally. This ensures both the left and right stereo channels have equal tracking force and generate equal signal levels. Incorrect azimuth creates channel imbalance, with one channel slightly louder than the other, and can also shift the stereo soundstage to one side unnaturally.
Most tonearms allow small azimuth adjustments by rotating the cartridge slightly in its mounting bracket. Some brackets have a small amount of rotational play; others require loosening the mounting screws slightly. The procedure involves checking channel balance during playback while measuring the cartridge’s angle. The gold standard tool is a specialized test record with stereo tones at specific frequencies that let you measure balance, but the method most home enthusiasts use is simpler: playing a mono recording (a stereo record mixed to mono works fine) and adjusting the cartridge until the sound appears centered between the speakers.
The more precise method involves using a microscope to check the stylus visually. If you look straight down at the cartridge from above, the stylus should sit in the groove absolutely centered, not favoring either the left or right groove wall. A Jiusion Original 40-1000X USB Microscope with portable carrying case costs around $25 and gives you clear visual confirmation. Place the cartridge over a record groove, angle the microscope to look straight down the stylus, and adjust the cartridge’s rotation until the stylus sits centered. This is the most repeatable, accurate method available to home enthusiasts without expensive test equipment.
When adjusting azimuth, you’re rotating the entire cartridge in its bracket. Most modern cartridges allow this rotation by design. Vintage cartridges may have less rotational freedom in their mounting, and on some vintage tonearms, azimuth adjustment is practically impossible without remounting hardware. If your arm allows azimuth adjustment, try it. If it doesn’t, you’re working with whatever azimuth the designer chose, and you should focus your efforts on VTA and overhang instead.
The impact of small azimuth errors is subtle but real. A one-degree error might create a 2-3dB channel imbalance, noticeable but not dramatic. A five-degree error becomes very obvious, with clear shifts in the stereo image. The ear is extraordinarily sensitive to channel balance in stereo, so even small improvements here matter. Some cartridges ship with excellent azimuth from the factory. Others are clearly off, and five minutes of adjustment makes an obvious difference. Test records designed specifically for azimuth checking exist (the Shure V15 test record is the classic), but they’re expensive and rare. The mono listening method is surprisingly accurate if you sit in the listening sweet spot, roughly equidistant from both speakers.
Now that you understand what each parameter does, here’s how to dial them in on your turntable. The sequence matters because each adjustment can slightly affect the others. Work through them in this order: VTA, then overhang, then azimuth. Patience is essential because the movements are small and easy to overshoot.
Prepare Your Workspace - Turn off your turntable and unplug it from the wall. Remove the platter if it’s removable, or work around it if it’s fixed. You’ll need a clear view of the cartridge and spindle. Set up good lighting focused on the cartridge area. If you’re checking azimuth with a microscope, position it on a sturdy stand where you can safely aim it at the stylus. Gather your tools: the alignment protractor, a ruler with millimeter markings, the azimuth tool or microscope, and your cartridge documentation. You’ll need the effective length specification from your tonearm manual.
Check and Adjust Vertical Tracking Angle (VTA) - If your tonearm has VTA adjustment, this is the first parameter to dial in. Consult your tonearm manual for the adjustment procedure; some arms have a calibration record you can use, while others use visual alignment or a blocking tool. For most vintage arms, you’re raising or lowering the arm rest at the back of the arm. The goal is 92 degrees from horizontal, or about 2 degrees forward tilt. Use a small block tool if you have one, or estimate visually by comparing the cartridge angle to a known reference. Once adjusted, secure the adjustment firmly. VTA should not shift during normal operation, only when you intentionally adjust it.
Verify and Adjust Overhang - Install the alignment protractor on the platter, centered on your spindle. The protractor shows a grid with markings for different arm effective lengths. Your tonearm documentation specifies its effective length (commonly 220-250mm for vintage arms). Align the protractor so the center spindle hole matches your turntable spindle. Now, without playing the record, gently position the cartridge so the stylus sits on the protractor surface. Slide the cartridge in its bracket until the stylus aligns exactly with the specified null points on the protractor for your arm’s effective length. This is the critical measurement. Take your time. If the stylus sits forward of the specified points, you need less overhang; slide the cartridge backward in the bracket. If it sits behind the points, you need more overhang; slide it forward. The movement is usually small, often just 1-2mm. After each micro-adjustment, double-check the alignment. When you’ve got it right, mark the cartridge position with a pencil line on the mounting bracket for future reference.
Check Azimuth - With VTA and overhang now set correctly, you can check azimuth. Turn the turntable on and play a mono record or a stereo recording mixed to mono. Place it near the center of the record to minimize the effect of tracking force and inner-groove distortion. Listen carefully to the left and right speakers. The sound should appear centered between them. If the image shifts to one side, azimuth is off. Loosen the cartridge mounting bracket slightly (just enough to allow rotation, not enough to shift the cartridge position), and rotate the cartridge a few degrees. Listen again. Continue rotating in small increments until the stereo image feels centered. This is subjective and depends on your listening position, so sit in your normal listening spot. When the image feels centered, tighten the bracket screws again. Alternatively, use the microscope method: remove the record, position the USB microscope over the cartridge to look straight down at the stylus, and adjust the cartridge rotation until the stylus sits centered in the groove. This is more objective but requires more equipment.
Verify Tracking Force - Now that you’ve adjusted all three parameters, check your tracking force. This is the downward force the cartridge exerts on the record, and it interacts with all your alignment settings. Consult your cartridge documentation for the recommended tracking force (typically 1.5-2.5 grams for modern cartridges, slightly higher for vintage ones). Use a tracking force gauge or digital scale to verify the setting. If it’s not in the specified range, adjust your tonearm’s tracking force dial. Once adjusted, listen to a record you know well and assess the overall sound quality.
Fine-Tune and Document - Play several records across different genres: jazz, classical, rock, and pop. Listen for balanced stereo imaging, clear dynamics, and clean high-frequency detail. If you notice issues, revisit the parameter that most likely affects them. Channel imbalance usually means azimuth needs work. Dull highs suggest VTA is too shallow. Excessive sibilance means VTA is too steep. Track these observations and make small adjustments as needed. Once you’re satisfied with the alignment, document your settings clearly. Note the VTA position (if adjustable), the cartridge sliding position relative to your marked reference line, and any azimuth rotation from center. This documentation is invaluable if you ever need to remove the cartridge for cleaning or stylus replacement. You can quickly return to these proven settings without having to re-measure everything.
Incorrect alignment is so common that most of the distortion people hear in vinyl playback is actually setup error, not the equipment itself. Here are the mistakes we see repeatedly and how to avoid them.
Mistake 1: Ignoring the Protractor
Many people eyeball the alignment without using tools, assuming close enough is good enough. This doesn’t work. The overhang distance of just 2-3mm can create dramatic tracking error that worsens progressively as you move across the record. You feel it as inner-groove distortion, particularly on rock and pop records where grooves are dense. The solution is non-negotiable: you’ll need an alignment protractor. The cost is minimal compared to the improvement in sound quality.
Mistake 2: Adjusting VTA Too Frequently
Chasing tone by constantly adjusting VTA is tempting but counterproductive. Each adjustment bumps your overhang and azimuth slightly. Set VTA correctly once, based on your arm’s design, and leave it alone. If you feel the need to adjust it every time you change records, your cartridge is poorly aligned in the other parameters.
Mistake 3: Confusing Tracking Force with VTA
These are separate adjustments. Increasing tracking force does not change VTA; it only increases the downward pressure on the record. Some people increase tracking force thinking it will fix alignment problems, but this just accelerates wear. Set VTA first, then set tracking force independently.
Mistake 4: Not Accounting for Arm Geometry
Different tonearms have different effective lengths and base geometries. What works for a Technics SL-1200 doesn’t work for a Denon DP-1200. Always check your arm’s documentation for the correct effective length and the recommended alignment geometry (usually Baerwald). Using the wrong specification creates systematic alignment error across the entire record.
Mistake 5: Ignoring Cable Tension
As you move the cartridge in its bracket to adjust overhang, the cartridge wiring flexes and can affect positioning. Keep tonearm cable slightly loose but not so loose it drags on the tonearm. If you notice the cartridge shifting position after you’ve dialed it in, check whether the cable is pulling on it.
Mistake 6: Moving the Cartridge Mounting Bracket
Some tonearms allow the entire cartridge head shell to be removed and replaced. If you remove it and reinstall it, overhang and azimuth may shift. Mark the position before removing anything. If you must remove the head shell, remeasure everything afterward.
Q: Do I need professional alignment, or can I do this myself?
You can absolutely do this yourself if you take time and use proper tools. The main advantage of professional alignment is that technicians have precision equipment and experience, so they work faster. The results are usually very good but not necessarily better than careful home adjustment. The real advantage of professional service is if your tonearm has complex adjustments or you’re uncomfortable making measurements. For most vintage arms and entry-level turntables, home alignment with basic tools works perfectly well. Save the professional service for complex problems like worn bushings or damaged mounting points that affect positional stability. The cost of alignment tools ($40-60 total) is trivial compared to professional fees ($100-300), so buying the tools and doing it yourself makes sense even as a one-time investment.
Q: How often should I realign my cartridge?
If you’re not moving your turntable or removing the cartridge, alignment shouldn’t drift. Check it when you first set up the turntable, then periodically every 6-12 months if the turntable gets heavy use. If you remove the cartridge for any reason (cleaning, stylus replacement), verify alignment before playing again. Vibration from the turntable itself doesn’t cause alignment drift; the mechanical construction is stable enough for that. But if you move the turntable or store it and retrieve it, check alignment when you set it back up. Environmental changes like significant temperature swings can sometimes affect mechanical tolerances slightly, so if you live in a climate with seasonal extremes, an annual check is prudent.
Q: My cartridge came pre-aligned from the factory. Do I still need to check it?
Probably yes. Most cartridges are aligned to generic specifications at the factory without knowing your specific tonearm geometry. Some manufacturers do quite well with generic alignment, but many don’t. The only way to know is to measure. If your cartridge came with documentation specifying alignment for your exact arm, follow that. Otherwise, treat factory alignment as a starting point and refine it yourself. You might find the factory alignment is already excellent, in which case you’ve confirmed it and can move on. More often, you’ll find small improvements available, particularly in overhang.
Q: What if my tonearm doesn’t allow VTA adjustment?
Accept the fixed VTA and focus on overhang and azimuth. Many good vintage arms have no VTA adjustment, and you can still achieve excellent sound by dialing in the other parameters. The arm’s designer chose a VTA that works reasonably well for the arm’s geometry and typical cartridges, so you’re not starting from a terrible position. VTA is important, but the other two parameters affect sound quality almost as much. A properly aligned overhang and azimuth on a fixed-VTA arm will sound dramatically better than a poorly aligned arm where VTA is adjustable.
Q: Why does my stereo image shift to one side even after adjusting azimuth?
Channel imbalance has multiple causes. Azimuth is the most common, but incorrect overhang also creates imbalance, as does uneven tracking force (if your cartridge weight is unevenly balanced on the arm). Also check that your cartridge’s output channels are within the specified impedance matching. If impedance is way off, your preamp may not be processing them equally. Start by double-checking azimuth with the microscope method if possible, as listening-based adjustment can be influenced by room acoustics and listening position. If azimuth looks correct and imbalance persists, verify your cartridge’s stereo balance using a test record with known stereo channels.
Proper phono cartridge alignment transforms vinyl playback. VTA, overhang, and azimuth are not optional tweaks for obsessives; they’re foundational setup parameters that determine how well your cartridge can track the groove and deliver accurate sound. The good news is that you have all the tools needed to dial them in correctly yourself. A simple protractor costs under $20. A USB microscope, also under $30. Your tonearm documentation and a ruler. With these and the procedure outlined here, you can achieve alignment quality that matches professional service.
The investment in time and attention is small compared to the payoff: deeper soundstage, better channel balance, cleaner high frequencies, and dramatically slower stylus wear. If you’ve been listening to vinyl for years without checking alignment, you’ve almost certainly been hearing less than your equipment is capable of delivering. Taking a few hours to dial these parameters in is one of the best audio improvements available for any budget. Your cartridge, your records, and your ears will thank you.
Bookmark this guide and revisit it every time you install a new cartridge.
Explore our guides to other essential turntable setup skills: How to Set Up and Calibrate a Turntable from Scratch covers the complete setup process, while How to Replace a Turntable Stylus walks you through the removal and installation process for when you need to swap cartridges or replace a worn stylus.
Vinyl Engine - Turntable Alignment Information Audio Engineering Society - Research on Cartridge Tracking