Vintage Integrated Amplifier Buying Guide: What to Look For on the Used Market
If you have been hunting used gear listings lately, you already know that vintage integrated amplifiers are everywhere - and that the price range runs from “too good to be true” to “this better come with a personal apology from the original owner.” Knowing how to evaluate a unit before you buy it is the difference between a weekend project and a doorstop.
In this guide we cover what an integrated amplifier actually is, which brands and eras are worth pursuing, what to inspect before handing over your money, and how to connect everything once you get it home.
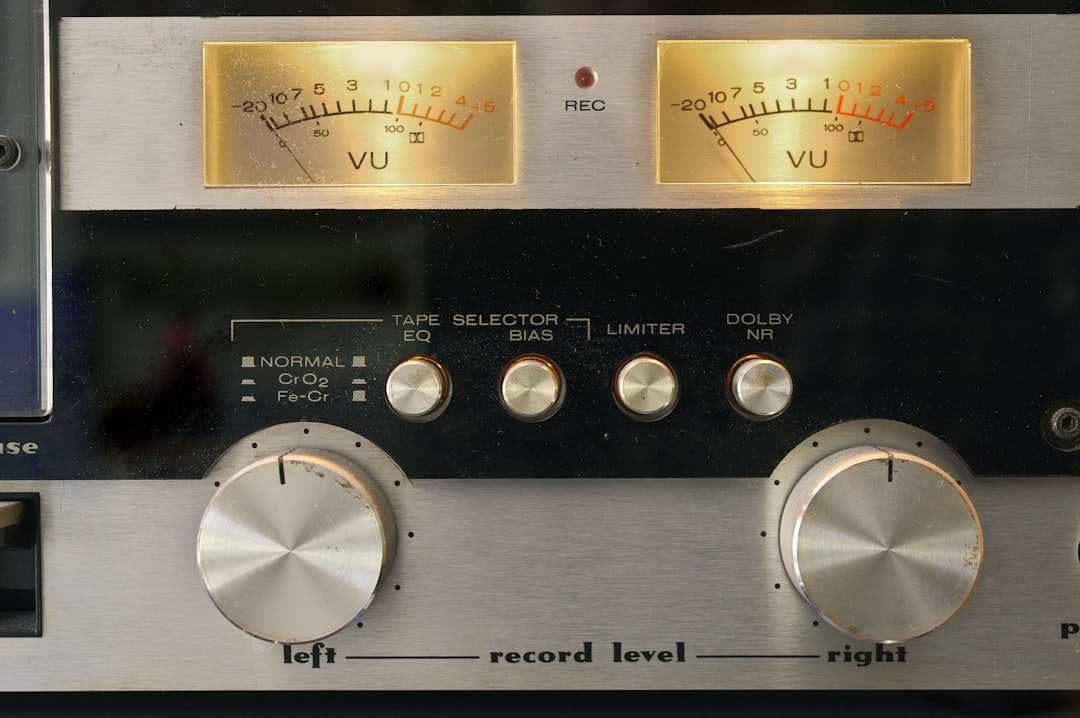
Photo by Immo Wegmann on Unsplash
Safety note: Vintage amplifiers contain capacitors that can hold a dangerous charge even when unplugged. Do not probe the interior of any amplifier while it is connected to power. If you plan to perform any internal work - replacing capacitors, cleaning controls, or tracing a fault - discharge the main filter caps first and let the unit sit unplugged for at least 30 minutes. If you are not confident working around mains voltage or high-voltage circuits, have the unit serviced by a technician before use.
What Is an Integrated Amplifier?
An integrated amplifier combines a preamplifier and a power amplifier in a single chassis. The preamp section handles source selection, volume control, and tone shaping. The power amp section drives your speakers. By combining both into one unit, manufacturers in the 1960s through the 1980s were able to deliver excellent sound quality at a lower price point than separates - and those price advantages translate directly to the used market today.
Integrated amplifiers are distinct from receivers, which add a built-in tuner to the same chassis. Both are worth pursuing, but a pure integrated often means the manufacturer spent more of the budget on the amplification circuit rather than a tuner stage you may never use.
Why Vintage Rather Than New?
The honest answer is that well-maintained vintage integrated amplifiers often outperform comparably priced new gear in terms of build quality, output transformer design (for tube units), and sheer physical heft. In our experience testing units side by side, a properly serviced early-1970s Sansui AU-series amplifier consistently delivers a warmth and control at the bass end that budget new amplifiers struggle to match.
There is also the practical consideration of repairability. Vintage units use through-hole components that any competent technician can replace. Many modern budget amplifiers are not designed to be repaired at all.
That said, buying vintage means accepting some risk. Electrolytic capacitors have a finite lifespan, bias settings drift, and controls corrode. We cover how to assess all of these below.
Brands and Eras Worth Pursuing
Japanese Solid-State (late 1960s to early 1980s)
This is the sweet spot for most buyers. Japanese manufacturers - Sansui, Pioneer, Kenwood, Marantz (Japanese-made units), and Yamaha - were producing integrated amplifiers during this period that remain competitive today.
Standout models to search for:
- Sansui AU-series (AU-505, AU-717, AU-919): Known for musical midrange and solid bass grip
- Pioneer SA-series (SA-9100, SA-8500 II): Good build quality, widely available parts
- Kenwood KA-series (KA-7100, KA-9100): Often underpriced relative to their performance
- Yamaha CA-series (CA-1000 III, CA-2010): Excellent phono stages and clean power delivery
Avoid units from the mid-1980s onward unless you have a specific reason. Build quality declined significantly as manufacturers chased lower price points.
British Integrated Amplifiers
Leak, Quad, Sugden, and Naim all produced notable integrated amplifiers. These tend to command higher prices on the used market but are generally well-documented and have active service communities. The Leak Stereo 20 (a tube unit) and the Quad 303/33 combination (technically separates, but often sold together) are worth a look if you can find them in good condition.
Tube Integrated Amplifiers
Vintage tube integrateds require a higher level of care and more frequent maintenance, but the sonic character - particularly the harmonic distortion profile - appeals strongly to many listeners. If you go this route, budget for a full service before use. Tubes degrade, bias drifts, and coupling capacitors fail in ways that can damage output transformers if left unaddressed.
What to Inspect Before You Buy
Visual Inspection
Start by looking at the front panel and rear panel under good lighting. Bent or stripped RCA jacks suggest rough handling. Cracked or missing knobs are cosmetic issues but can hint at a hard life. Burn marks or discoloration around any component on the circuit board inside (if you can see through the vents) are red flags.
Listening Test
Always listen before you buy when possible. Feed a known source - ideally the turntable or player you will actually use - into both channels. Listen for:
- Hum: A low-frequency 60Hz hum usually indicates a grounding issue or failing filter capacitors. A faint hum from the transformer is normal. An audible hum from the speakers at any volume is not.
- Crackling or intermittent dropout: This typically means dirty potentiometers or oxidized switch contacts. It is usually fixable with a control cleaner, but factor that work into the price.
- Channel imbalance: Both channels should track evenly as you rotate the volume control. Severe imbalance at low volumes often means a worn or dirty volume pot.
- Distortion at volume: Crank it to a moderate listening level and check for harshness or breakup. Some distortion at extreme volume is normal; distortion at moderate levels is not.
Bias and DC Offset
If the seller will allow it - or if you are buying in person - bring a multimeter. On most solid-state integrated amplifiers you can check DC offset at the speaker terminals. Anything above 50mV at rest is worth investigating before connecting good speakers.
Cosmetic vs. Functional Priorities
We have found that cosmetically rough units often sound just as good as pristine examples - and cost significantly less. A scratched faceplate does not affect the audio circuit. Focus your inspection effort on the functional checks above and use any cosmetic imperfection as a negotiating point.
Setting Up Your Integrated Amplifier
Once you have brought a unit home, there are a few steps worth taking before you start a serious listening session.
Clean the controls. Use a quality contact cleaner (DeoxIT D5 is the industry standard) sprayed into each potentiometer and switch, then work the control back and forth several times. This removes oxidation that builds up from years of disuse. Even units that tested clean at purchase often improve noticeably after this step.
Check the speaker binding posts. Loose or oxidized binding posts cause intermittent connections. Retighten them and clean with a contact cleaner if needed.
Confirm the phono input impedance. Most vintage solid-state integrated amplifiers have a fixed 47k ohm phono input designed for moving-magnet cartridges. If you are using a moving-coil cartridge, you will need an external step-up transformer or a phono stage with adjustable loading. See our guide to phono preamps for more on matching gain and impedance.
Connect speakers with good cable. Speaker cable quality matters less than internet forums suggest, but connection quality matters a great deal. Use proper banana plugs or spade connectors and make sure there are no stray wire strands that could cause a short.
For a step-by-step walkthrough of the full setup process, including how to connect sources and set gain levels, see our guide to setting up a vintage receiver - most of those steps apply directly to integrated amplifiers as well.
If you want to cross-reference a unit’s original specifications, the Hifi Engine database is the most comprehensive free resource for vintage amplifier manuals, service diagrams, and original spec sheets.
How Much Power Do You Actually Need?
Vintage integrated amplifiers are often rated at 20 to 100 watts per channel. For a typical listening room with reasonably efficient speakers (88dB/1W/1m or higher), 30 to 50 watts is more than sufficient. Higher wattage rarely makes an audible difference at normal listening levels - it primarily extends the headroom before clipping on dynamic peaks.
What matters more than wattage is the quality of the power supply and the output stage topology. A well-designed 35-watt amplifier will typically sound better than a poorly designed 100-watt unit.
Recommended Products
If you want the sonic character of vintage design without the search-and-service process, the Yamaha A-S301 Integrated Amplifier is a modern option built on classic Yamaha circuit topology. It includes a phono stage, a headphone output, and the kind of build quality that has largely disappeared from budget new gear.
If your integrated amplifier lacks a phono stage - which is common on units from the 1980s onward - the Pro-Ject Phono Box S2 is a well-regarded external phono preamp that works with both moving-magnet and moving-coil cartridges. It is compact, quiet, and offers loading adjustments without requiring soldering.
For speaker connections, AudioQuest Tower Speaker Cable is a reliable choice that terminates cleanly and does not break the bank. Proper termination makes more difference than exotic cable materials.
As an Amazon Associate we earn from qualifying purchases at no extra cost to you.
The Long View
A well-chosen vintage integrated amplifier, properly serviced, will last another 30 to 40 years with only occasional maintenance. The used market rewards patience - if a unit seems overpriced, wait. Another example will appear. In our experience, the best deals come from estate sales and local listings where the seller knows little about what they have and simply wants it gone.
The search is part of the hobby. Take your time, do the listening test, and do not let cosmetics drive the purchase. The right unit is out there.
Bookmark this guide and check out our phono preamps explained article next - choosing the right phono stage is the most underrated upgrade in a vintage system.