Speaker Placement and Room Acoustics for Vinyl Listening
Most people who invest in a vintage HiFi system spend their energy on the equipment: the turntable, the receiver, the speakers. That’s understandable. But once the gear is sorted, the next variable that shapes what you actually hear is the room itself. A pair of well-regarded vintage bookshelf speakers placed in the wrong position in an untreated room will sound noticeably worse than a modest pair in the same room with thoughtful setup.
This guide covers the practical side of speaker placement and acoustic treatment for a home vinyl listening room. We’re not talking about building a dedicated studio or buying expensive gear. We’re talking about how to position your speakers, deal with bass buildup, tame slap echo, and make real improvements with minimal investment.
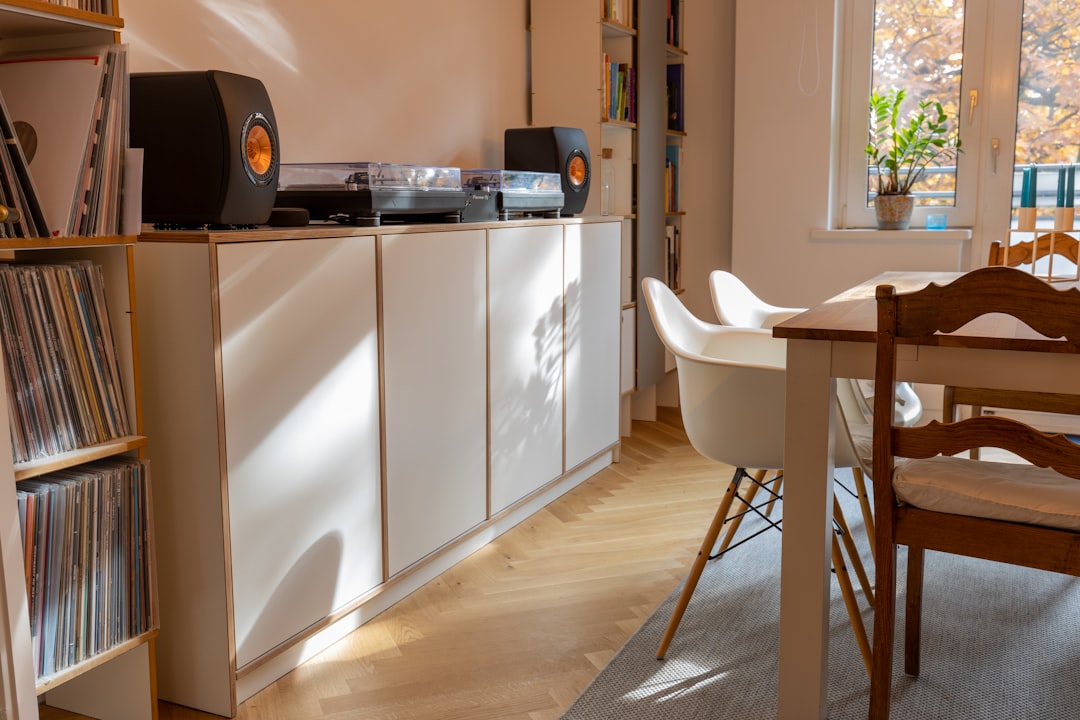
Photo by Pickawood on Unsplash
Why Speaker Placement Matters More Than Most Gear Upgrades
Before adding acoustic treatment or buying better speakers, placement is the first variable to get right. Changing a speaker’s position by 12 inches in any direction can dramatically alter how bass frequencies develop and how well the stereo image locks in. These are not subtle differences. In our experience setting up various vintage systems, correcting poor speaker placement has produced clearer improvements than swapping components in an already-decent system.
The reason comes down to how sound behaves in an enclosed room. Speakers don’t only send sound toward you. They radiate in multiple directions. Sound reflects off the floor, ceiling, side walls, and rear wall. Those reflections arrive at your ears slightly delayed relative to the direct sound. When the delay is long enough, you hear it as ambience or reverb. When it’s short, your brain partially fuses it with the direct sound but it still affects tonality, stereo width, and imaging precision.
Proper placement reduces the worst reflections, particularly early reflections from the side walls and the bass buildup that occurs near room boundaries.
How Room Boundaries Affect Bass and Imaging
The two most common acoustic problems in a typical living room are boundary bass reinforcement and early reflections.
Boundary bass reinforcement happens because low-frequency sound waves are long. At 80 Hz, a sound wave is about 14 feet long. When a speaker is placed close to a wall, the reflected bass wave from that wall combines with the direct wave from the speaker. Depending on the distance from the speaker to the wall, the reflections can add to bass output (making it boom) or partially cancel it (making bass thin and inconsistent). This is why bass quality often improves significantly when speakers are moved away from the rear wall.
The standard starting point recommendation is to pull speakers at least 2 to 3 feet from the rear wall behind them. In a typical rectangular room, this dramatically reduces the worst bass loading. Some speakers are designed with rear ports and are more sensitive to rear-wall proximity than sealed or front-ported designs. If you are using rear-ported vintage bookshelf speakers such as early JBL L-series or Klipsch Heresy variants, give them more breathing room than a sealed box would require.
Early reflections are the other main culprit. Your ears receive the direct sound from the speakers first, then a fraction of a millisecond to a few milliseconds later, they receive reflections off the nearest surfaces. The most problematic are first reflections from the side walls. These arrive closely enough after the direct sound that the brain doesn’t fully separate them, and they blur stereo imaging and reduce the sense of depth.
The side-wall reflection point can be found by sitting in your listening position and having someone slide a small mirror along the side wall. The point where you can see the speaker tweeter reflected is where the first reflection strikes the wall. Treating that point with absorption or diffusion makes an audible difference in imaging precision.
Step-by-Step Speaker Placement for a Vinyl Listening Room
This is the placement sequence we use when setting up any new vintage system. Follow it in order, since each step depends on getting the previous one approximately right before fine-tuning.
Step 1: Start with equal spacing from the rear wall.
Place both speakers the same distance from the rear wall. A good starting point for most bookshelf speakers is 2 to 3 feet. Floor-standing speakers with large woofers may need 3 to 4 feet. Mark the position with tape so you can return to it if later adjustments go wrong.
Step 2: Set speaker spacing relative to your listening distance.
The three points of the equilateral triangle (left speaker, right speaker, and listening position) should be roughly equal. If you plan to sit 8 feet from the speakers, start with the speakers 8 feet apart. This is not a rigid rule, but it is a reliable starting point. Wider spacing opens the stereo image; narrower spacing can improve center focus. Experiment in 6-inch increments.
Step 3: Set toe-in angle.
Toe-in means angling the speakers inward toward the listening position. Some speakers sound best aimed directly at the listening position (heavy toe-in). Others sound better with minimal toe-in, facing nearly straight ahead. Start with the speaker aimed directly at your head. Play a familiar record with strong center-channel content (a vocalist, a kick drum) and listen for how solid the center image is. Then try reducing toe-in progressively until the image starts to blur or widen unnaturally. Most vintage two-way bookshelf speakers from the 1970s (such as the Advent 3 or AR-4x) perform well with moderate toe-in, roughly 10 to 15 degrees inward.
Step 4: Adjust tweeter height.
The tweeter should be at ear level when seated. For small bookshelf speakers on stands, this is the main reason stands matter beyond aesthetics. A speaker with its tweeter pointed at your chest or at the ceiling loses upper-frequency detail in the listening position. Speaker isolation pads such as the 2-pack acoustic isolation pads by a popular budget brand can also be used to angle the speaker slightly upward or downward when fine-tuning tweeter aim.
Step 5: Check mono for symmetry.
Switch your receiver or preamp to mono if it has that function. A mono signal should collapse to a single, precisely defined point in the center of the soundstage. If the mono image drifts left or right, or if it sounds like it’s coming from slightly different distances on each side, your left-right symmetry is off. Check that both speakers are the same distance from the listening position and the same distance from their respective side walls.
Step 6: Adjust rear-wall distance for bass balance.
Move both speakers closer to the rear wall in 4-inch increments while playing a bass-heavy track. When you find the point where bass starts to sound one-note or exaggerated in the upper bass (around 100 to 200 Hz), back off 6 to 12 inches. This is the rear-wall proximity effect in action. Most of the time, the best position is 2 to 3 feet from the rear wall, but the exact point depends on the speaker’s tuning and your room’s dimensions.
Near-Field vs. Far-Field Listening Setups for Vinyl
One of the choices worth making deliberately is whether you are setting up a near-field or far-field listening position. These are distinct approaches with different sonic characteristics and different placement implications.
| Setup | Listening Distance | Speaker Spacing | Primary Benefit | Main Limitation |
|---|---|---|---|---|
| Near-field | 3 to 5 feet | 3 to 4 feet | Room reflections minimized; tight imaging | Less sense of scale; fatiguing for long sessions |
| Far-field | 8 to 12 feet | 7 to 9 feet | Natural scale; more immersive | Room acoustics matter more; bass modes more audible |
| Mid-field | 5 to 8 feet | 5 to 7 feet | Good compromise for most living rooms | Requires some acoustic treatment to work well |
Near-field setups reduce the influence of the room substantially because you are primarily hearing direct sound. Engineers use near-field monitors in studios specifically to hear the recording rather than the room. For vinyl listening, this can work very well for analytical listening or if your room is particularly reflective, but it reduces the sense of three-dimensional space that larger vintage speakers are capable of creating.
Far-field setups let the speakers breathe and produce scale. The Sansui SP-5500 or vintage AR-3a sound best when you can sit well back from them. The trade-off is that room acoustics become more important. Bass modes, early reflections, and rear-wall reflections all have more time and distance to develop before reaching your ears.
For most listening rooms in a typical home, a mid-field setup with some targeted acoustic treatment gives the best balance.
Room Acoustics for Vinyl Listening: What Actually Works
Acoustic treatment for a home listening room doesn’t need to look like a recording studio. The goal is targeted control of the worst problems, not anechoic conditions. Vinyl records have a warmth and spaciousness that benefits from some room liveliness. You are not trying to eliminate all reflections. You are trying to reduce the ones that cause specific problems.
The three highest-impact locations for treatment:
First reflections from the side walls are the single most audible problem in most rooms. Placing absorption at the mirror points on both side walls improves stereo imaging noticeably. Acoustic foam panels or a thick bookshelf can both work. A set of acoustic foam wedge panels like these 12x12x1-inch wedge-style foam panels placed at the side-wall reflection points provides measurable reduction in reflected energy. The panels do not need to be large or expensive. A 2 square foot patch at each reflection point is enough to make an audible difference.
Bass trapping in room corners is the second-highest-impact treatment. Bass builds up in room corners because that’s where pressure from multiple boundaries accumulates. Broadband bass traps (thick mineral wool or open-cell foam) placed floor-to-ceiling in corners reduce low-frequency modal resonance. This is the treatment that’s most commonly underdone in amateur listening rooms because it requires bulky material, but it’s the one that actually tightens up muddy bass.
Rear-wall diffusion or absorption prevents rear-wall reflections from muddying the soundstage. A diffuser (a bookshelf filled with records is a reasonable analog) breaks up the rear-wall reflection and scatters energy in multiple directions rather than sending it directly back toward the speakers. Absorption works too, but in a small room, too much rear-wall absorption can make the room feel airless.
What doesn’t work:
Egg carton foam is an internet myth. It has almost no acoustic absorption value and creates a fire risk. Thin foam squares less than 1 inch thick absorb high frequencies only and do nothing for mid-bass. Carpeting on one wall is decorative, not acoustic treatment.
For speaker coupling to the equipment rack or stand, using isolation pads under bookshelf speakers reduces transmitted vibration back into the record player or the shelf structure. The Fluance High Density Acoustic Foam Isolation Pads are a solid option for this purpose, designed specifically for bookshelf speakers with adjustable listening angles built into the geometry of the pad.
For a rigorous overview of room acoustics fundamentals, the Acoustics of Small Rooms guide from the Acoustical Society of America provides technical depth for those who want to understand the physics behind the recommendations.
Related reading: How to Match Impedance Between Amps and Speakers
Common Speaker Placement Mistakes and How to Fix Them
Speakers pushed against the rear wall. This is the most common error, usually driven by furniture arrangement. The result is exaggerated, one-note bass and collapsed stereo depth. Fix: pull the speakers out by at least 2 feet. If furniture constraints prevent this, consider a sealed-box speaker design, which is less sensitive to rear-wall proximity than ported designs.
Asymmetrical placement. One speaker is 8 inches from the side wall, the other is 3 feet from its side wall. This creates a tonal imbalance where one channel sounds warmer or more bass-heavy than the other. In our experience, this asymmetry is often mistaken for a channel-balance problem with the amplifier. Fix: measure both speakers from their side walls and equalize the distances.
Speakers on the same surface as the turntable. This is a specific problem for vinyl listening that doesn’t apply to digital sources. The vibration from the speaker cabinet or the bookshelf it rests on can couple mechanically through the shelf into the turntable. The stylus then picks up that vibration as a feedback loop. At volume, this becomes audible bass rumble or, at extreme levels, a howl. Fix: put the turntable on a separate piece of furniture, or use vibration isolation feet under the turntable and decouple it from the speaker’s shelf as much as possible.
Too much toe-in on speakers with a wide dispersion tweeter. Some tweeters disperse at wide angles and are designed to be used with minimal or no toe-in. Pointing them directly at your ears can produce listening fatigue over long sessions. This is more common with dome tweeters in vintage 1970s designs. Fix: try listening with speakers aimed straight ahead and compare.
Ignoring the height of the listening chair. A speaker with the tweeter aimed correctly for a seated ear height sounds dramatically different if you lean back and drop your ear a foot lower. This matters especially with speakers that have narrow vertical dispersion. Fix: once you have the speakers positioned, sit in your normal listening posture and verify the tweeter is still at ear level.
FAQ
How far apart should my speakers be?
The equilateral triangle starting point is reliable: speaker spacing equal to your listening distance. For a typical living room where you sit 8 feet from the speakers, try starting with the speakers 8 feet apart, then adjust by ear. Too wide and the center image gets a hole in it. Too narrow and the soundstage compresses. A good test is to play a mono record and check that the center image is solid and defined. Then switch to stereo and see whether instruments spread naturally to the edges without disappearing in the center.
Do I need to treat my whole room, or just specific spots?
Just specific spots, in order of impact. The side-wall first reflection points are the highest priority. After that, corner bass trapping. After that, rear-wall treatment. You do not need to cover all surfaces. In fact, over-treating a room (too much absorption everywhere) makes it sound dead and removes the natural liveliness that makes vinyl listening enjoyable. Target the worst problems and leave the rest of the room as it is.
My bass sounds boomy no matter where I put the speakers. What’s wrong?
Boomy bass is almost always a room mode problem. Every room has resonant frequencies determined by its dimensions. When a bass note from a record hits one of those frequencies, it excites the mode and the bass hangs in the air longer than it should. The fix involves a combination of things: pull speakers away from the rear wall to reduce boundary reinforcement, add corner bass trapping, and if possible adjust your listening position (moving forward or back 1 to 2 feet can place you in a better part of the room’s pressure response). Moving your chair to avoid a bass pressure node is free and can be very effective.
Should I use speaker spikes, rubber feet, or isolation pads under vintage speakers?
For vintage speakers on a hardwood floor, spikes can improve bass tightness by coupling the speaker to the floor and reducing cabinet resonance. For speakers on carpet, spikes anchor the cabinet and prevent wobble. If the speakers share a shelf or stand with a turntable, isolation pads are preferable because they decouple the speaker from the surface and reduce vibration transmission to the record player. Choose based on your specific setup, not a universal rule.
Does room size matter for choosing which vintage speakers to use?
Yes, significantly. A large vintage floor-stander such as the JBL L100 or Sansui SP-5500 needs room to develop its bass response and create scale. In a small room (under 150 square feet), it will typically overload the room with bass even at modest volumes. A small to medium bookshelf speaker handles a small room better because it produces less output and the room doesn’t get overwhelmed. For vintage listening in a small room, look at the AR-4x, the Advent 3, or period bookshelf designs from Pioneer and Sansui. For a medium to large room (200 square feet and above), a floor-stander or a larger bookshelf speaker like the AR-3a or JBL L65 will use the room properly.
If you are setting up a complete vintage system from scratch, our Vintage Integrated Amplifier Buying Guide covers how to choose the amp before you start placing speakers.
Bookmark this page as a placement reference when your room changes or you add new speakers to the system. Drop a comment below if you have a room-specific situation that doesn’t fit the standard advice.