Best turntable accessories for new collectors: a starter guide
This post contains affiliate links. As an Amazon Associate, I earn from qualifying purchases at no extra cost to you.
Turntables are the centerpiece of any vinyl setup, but a great turntable alone doesn’t guarantee great sound. The accessories you choose shape your listening experience, protect your records, and extend the life of your equipment. Yet many new collectors buy a turntable and neglect the peripherals that make the biggest difference.
This guide covers the essential accessories every vinyl collector should own, from cleaning solutions to tracking force gauges. I’ve focused on tools that deliver measurable improvements and won’t drain your budget - products you’ll actually use, not shelf clutter.
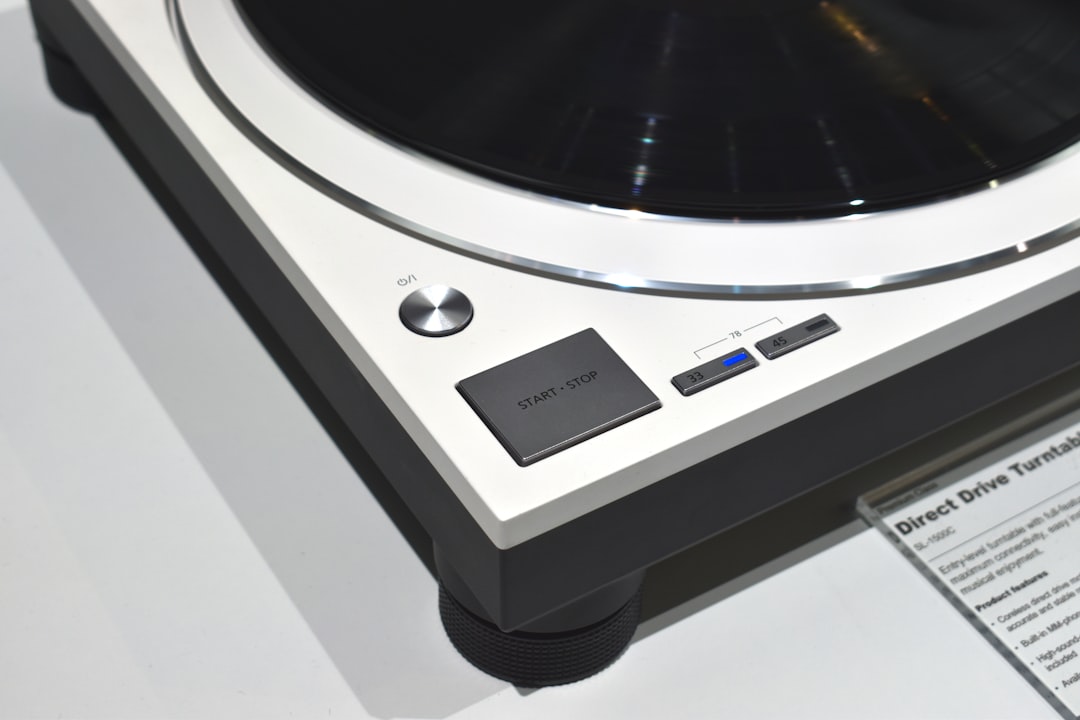
Photo by Gavin Phillips on Unsplash
Headshell considerations and cartridge mounting
The headshell sits at the end of your tonearm and holds the cartridge in place. Many turntables ship with basic plastic headshells that color the sound and lack precision. Upgrading to a universal aftermarket headshell like the Audio-Technica AT-HS6BK Universal Turntable Headshell immediately improves clarity and reduces resonance.
Aluminum and stainless steel headshells are industry standard for a reason: they don’t vibrate like plastic, so the cartridge signal reaches the preamp cleanly. When you pick up a quality headshell, you’ll notice the weight difference - that mass dampens spurious vibrations that otherwise cloud your highs and muddy your mids.
Choose a headshell that matches your tonearm’s connection type (standard SME connector or Technics-style straight connector). Installation takes five minutes with a small screwdriver. Once mounted, proper headshell offset angle becomes critical for tracking accuracy, which we’ll cover in the stylus alignment section. For more on headshell standards, see Audio-Technica’s technical specifications for your specific cartridge model.
Record cleaning and dust control
Dust is the enemy of vinyl longevity and sound quality. A single dust particle creates a pop or click that pulls you out of the music. Worse, dust grinds into the groove with each play, permanently degrading the recording.
Budget for a dedicated cleaning kit. The EVEO 4-in-1 Vinyl Record Cleaning Kit includes a velvet record brush, cleaning liquid, a duster, and stylus-cleaning gel. Follow the kit directions and avoid applying excess liquid directly to the record or stylus.
Deep cleaning once a month prevents dust accumulation. Most collectors skip this, which is why their records sound worse over time while yours stay clean. Make it a ritual: put on a record you’ve cleaned recently and hear the difference. The clarity jump is remarkable.
Beyond surface cleaning, consider a Preffair Record Weight Stabilizer to hold records flat during play. Warped records introduce wow and flutter (pitch variation). A good clamp keeps the record locked to the platter, stabilizing the groove contact. This is especially important for lighter-weight records or older vinyl that’s warped from storage. The Library of Congress Vinyl Preservation Guide offers comprehensive standards for record care and storage.
Tracking force, alignment, and stylus protection
Tracking force and stylus protection
Tracking force - the downward pressure of the stylus on the groove - is the most misunderstood parameter in vinyl playback. Too light, and the stylus skips and slides across grooves (mistracking). Too heavy, and it gouges the groove walls, damaging the record permanently.
Most cartridges specify a range, typically 1.5 to 3 grams. Setting force to the manufacturer’s recommended value requires a tracking force gauge. Digital gauges remove guesswork - place the gauge on the turntable and lower the stylus onto it, then adjust the counterweight until the display reads your cartridge’s specification. For detailed tracking force specifications, consult Ortofon’s official cartridge documentation for your specific model.
A quality gauge like the DIGITNOW Digital Stylus Force Gauge costs under $30 and pays for itself in preserved records. Without it, you’re likely running heavy (to avoid skipping) or light (chasing a bright sound), both of which accelerate stylus wear.
Check tracking force every three months. Counterweights drift, and you want to stay within spec. A stylus typically lasts 1,000 to 2,000 hours of play - strict tracking force adherence extends this to 2,500+ hours.
Proper alignment tools and azimuth
Phono cartridges must sit precisely on the record groove. Two angles matter: tracking force (covered above) and azimuth - the left-right tilt of the stylus relative to the groove walls.
Misaligned azimuth causes uneven contact, sending more signal to one channel than the other. You’ll hear this as a subtle loss of stereo imaging, especially on well-recorded classical or jazz albums. Correcting azimuth requires no tools beyond what you already have: tilt the cartridge body left or right using adjustment screws on the headshell until both channels balance.
An alignment protractor tool simplifies this. The Audio-Technica AT-CAP1 Cartridge Alignment Protractor places directly on your record and shows whether your cartridge is square to the groove. Proper alignment takes ten minutes and delivers noticeably better stereo separation.
VTA (vertical tracking angle) also matters - the tilt of the tonearm relative to the record surface. Most tonearms leave the factory at roughly the correct angle for standard LPs, but warped records or different turntables may require micro-adjustments. For now, focus on headshell offset (using the protractor) and tracking force (using the gauge). Master those two, and you’ve solved 90% of alignment issues.
Anti-vibration and isolation products
Turntables are sensitive to vibration. Footsteps, speakers, and air conditioning all transmit vibration into the platter, and that energy becomes noise in your signal. Isolation pads under the turntable absorb this vibration rather than letting it travel through your furniture into the tonearm.
Sponge versus spring isolators
Sponge-based isolation pads work adequately and cost $15-30. They compress under the turntable’s weight and reduce high-frequency vibration - footsteps, HVAC vibration, and airborne sound waves from nearby speakers. The disadvantage is that sponge materials compress over time and lose effectiveness. Replace sponge pads every year or two, or when you notice they’ve flattened.
Spring-based isolators are more effective but cost more, typically $50-150 for quality units. Springs address a broader range of frequencies, including low-frequency vibration that sponge pads miss. If your turntable sits near your speakers or on a suspended floor that vibrates when you walk, spring isolators are worth the investment. Sorbothane feet (sold as individual discs) offer a middle-ground option - they last longer than foam and outperform generic rubber feet.
Shelf and furniture considerations
The surface your turntable rests on matters as much as the isolation material underneath it. A solid wood shelf bolted to studs outperforms a free-standing furniture piece that wobbles. Floating IKEA shelves work surprisingly well if anchored to studs - they isolate the turntable from floor vibration by decoupling it from the stand.
Wall-mounted turntable shelves eliminate the most common vibration path entirely. If your listening room has a suspended floor that transmits footstep vibration, a wall-mounted shelf changes the performance dramatically. These are available for under $100 from several manufacturers and take an hour to install.
Place your turntable on a level surface regardless of isolation strategy. Use a spirit level to check - even a slight tilt introduces tracking force imbalance. If one side of the turntable is 1-2mm lower than the other, your counterweight isn’t applying force evenly across the stylus.
Decoupling the platter from your amplifier
One isolation strategy that new collectors overlook: keep your amplifier off the same shelf as your turntable. Amplifier transformers vibrate at 60Hz (or 50Hz outside North America), and that vibration conducts directly into the turntable platter if both units share a shelf. The result is a persistent low-level hum that you may blame on cartridge shielding or cable routing.
Separate shelves for source components and amplification isn’t audiophile excess - it’s practical vibration control. If you’re running a rack system with everything stacked, moving the turntable to a dedicated shelf above or beside the rack is one of the cheapest performance improvements available.
Phono cable and interconnect upgrades
The cables connecting your turntable to your phono preamp or receiver carry a tiny signal - typically 3-5 millivolts from a moving magnet cartridge, much less from a moving coil. At this signal level, cable quality matters more than it does anywhere else in your system.
What to look for in phono cables
Shielding is the first priority. A phono cable without proper shielding picks up radio frequency interference, hum from nearby power cables, and noise from smartphones and other electronics. Quality phono cables use braided copper shielding that encloses the signal conductors entirely. Unshielded “budget” RCA cables that work fine for a CD player or streaming device introduce audible hum at phono-level signals.
Connector quality is the second priority. The RCA connectors at each end of the cable should grip firmly - loose connectors develop intermittent noise as the connection oxidizes over time. Gold-plated connectors resist oxidation better than bare copper. The tightness of fit matters too: a connector that wiggles in the jack introduces channel dropout and crackle.
Grounding and the dedicated ground wire
Most turntables include a separate ground wire - a thin wire with a bare spade connector on one end and a connector for the turntable on the other. This wire connects to the grounding post on your phono preamp or receiver. Without it, you’ll typically hear a persistent 60Hz hum.
Connect the ground wire before you power anything on. Tighten the ground post on the receiver by hand until snug - you don’t need tools. If the hum persists after connecting the ground wire, try grounding the turntable’s chassis to a chassis point on the receiver (not the signal ground), since some older turntables use a floating chassis design that requires a different ground path.
Cable routing away from power
Route phono cables away from power cords. Parallel runs of signal cables and power cables within a few inches of each other induce hum through electromagnetic coupling. If your setup requires cables to cross, cross at 90 degrees rather than running parallel. Keep phono cables short - under six feet - since longer runs have more antenna surface area for picking up interference.
A cable upgrade from stock to a quality shielded phono interconnect typically costs $25-60. This is money well spent before you consider cartridge upgrades, since a poor cable wastes a good cartridge’s output.
Mistakes to avoid and your first week setup
New collectors often skip cleaning and proper tracking force setup because they see vinyl as a simple, plug-and-play format. This costs them years of record lifespan and thousands in premature wear.
One mistake is using generic furniture polish or water on records. Water leaves residue that attracts dust. Generic solvents strip protective oils from the vinyl surface. Use only vinyl-specific cleaning solutions, and even then sparingly.
Another common error is overshooting tracking force: many beginners crank the counterweight to prevent skipping, which accelerates stylus wear within months. Running 0.5 grams over your cartridge’s maximum spec can cut stylus life in half. The goal is the manufacturer’s recommended midpoint, not the maximum.
A third mistake that shows up in collector forums repeatedly is never checking or resetting the anti-skate. Anti-skate applies a small outward force on the tonearm to counteract the inward pull of the groove as the record plays. Without anti-skate, the stylus contacts the inner groove wall harder than the outer wall, wearing one channel’s groove unevenly. Set anti-skate to match your tracking force - if you’re tracking at 2.0 grams, set anti-skate to 2.0 as well.
The fourth major mistake is buying expensive accessories before nailing the basics. A $200 isolation platform won’t help if your stylus is misaligned or running at 2.5 grams when your cartridge calls for 2.0. Start with a tracking force gauge, an alignment tool, and a cleaning kit. These three purchases ($70-100 total) fix 80% of playback issues. Then add isolation, upgraded headshells, and specialized cleaning devices.
Finally, don’t neglect cable management. Shielded cables routed away from power sources reduce hum and noise. It’s not glamorous, but it matters more than most cosmetic upgrades.
Follow this step-by-step process to properly set up your turntable with new accessories:
-
Clean your records thoroughly using your new cleaning kit before playing them with your optimized setup. Follow the brush and cloth method described above to remove accumulated dust and debris.
-
Install your new headshell by disconnecting the old one from the tonearm and carefully mounting the aftermarket unit. Ensure the connector is fully seated and the headshell sits straight without tilting.
-
Measure and set tracking force by placing the digital tracking force gauge on the platter, lowering the stylus onto it, and adjusting your tonearm’s counterweight until the gauge displays your cartridge manufacturer’s recommended specification (typically 1.5-3 grams).
-
Verify cartridge alignment using your new alignment protractor by placing it on the turntable and checking that your cartridge sits square to the groove. Make fine adjustments using the headshell offset screws if needed.
-
Install isolation pads under each of your turntable’s feet, ensuring the unit sits level when you’re finished. Double-check with a spirit level.
-
Test your setup by playing a well-recorded album you know well, listening carefully for improved clarity, tighter bass, and enhanced stereo imaging compared to your previous setup.
FAQ
Q: Do I really need an aftermarket headshell, or is the stock one fine?
A: Stock plastic headshells work, but they color the sound. They ring at certain frequencies and add harshness that masks the music. If you want to hear what your cartridge is truly capable of, upgrade the headshell. Most upgrades cost $40-80 and deliver improvements comparable to a $500 cartridge upgrade. This is the single best value accessory purchase.
Q: How often should I clean my records?
A: Light brushing before every play removes dust. Deep cleaning once a month keeps residue from accumulating. If you buy used records, deep clean before the first play - old records accumulate dust and residue over decades. After cleaning, store upright in sleeves to prevent new dust accumulation.
Q: Can I use a stylus alignment tool on older turntables?
A: Yes. The protractor works on any turntable with a standard 1.25-inch record size. Older turntables may have nonstandard tonearms, but the vast majority accept aftermarket protractors. If your tonearm is fully integrated (unable to accept aftermarket headshells), you’re limited to factory adjustments only. This is rare in vintage models.
Q: What’s the difference between a record weight and a record clamp?
A: A weight sits on top of the spindle and presses down on the center label. A clamp screws into the spindle shaft from above, gripping the vinyl directly. Both work; clamps are more secure and prevent spindle wobble, but they require a spindle design that accepts them. Check your turntable’s manual before buying.
Q: Should I use a slipmat under my vinyl?
A: Most turntables ship with felt slipmats. Felt allows the record to rotate slightly against the platter during cueing, protecting the stylus from skips. Some audiophiles prefer rubber or leather mats, which grip harder and improve pitch stability. Experiment with what’s available - the difference is subtle but real. If you switch mats, also adjust tracking force, as different materials change the effective friction.
Upgrade path for the next year
You now have the foundation: proper cleaning, correct tracking force, and aligned cartridge. From here, the upgrade path divides by budget. If you have $200-400 to spend over the next year, invest in a new cartridge in the mid-range ($150-300). A Shure M97xE or Audio-Technica AT95E will sound noticeably better than entry-level carts and pair well with your newly optimized setup.
If budget is tighter, add quality isolation pads and improve your interconnect cables. If you have $1,000+, consider a turntable upgrade - the platter and motor matter more than most accessories. But don’t fall into the trap of expensive accessories before cartridge quality. The cartridge is your interface to the music; everything else supports that interface.
Start with what you have. Use the tools in this guide to maximize your current turntable’s potential. The improvements will surprise you.
</div>
Keep learning: Subscribe to the blog for weekly guides on vinyl playback and vintage audio restoration. New posts every Monday, Wednesday, and Friday.
Related reading: